

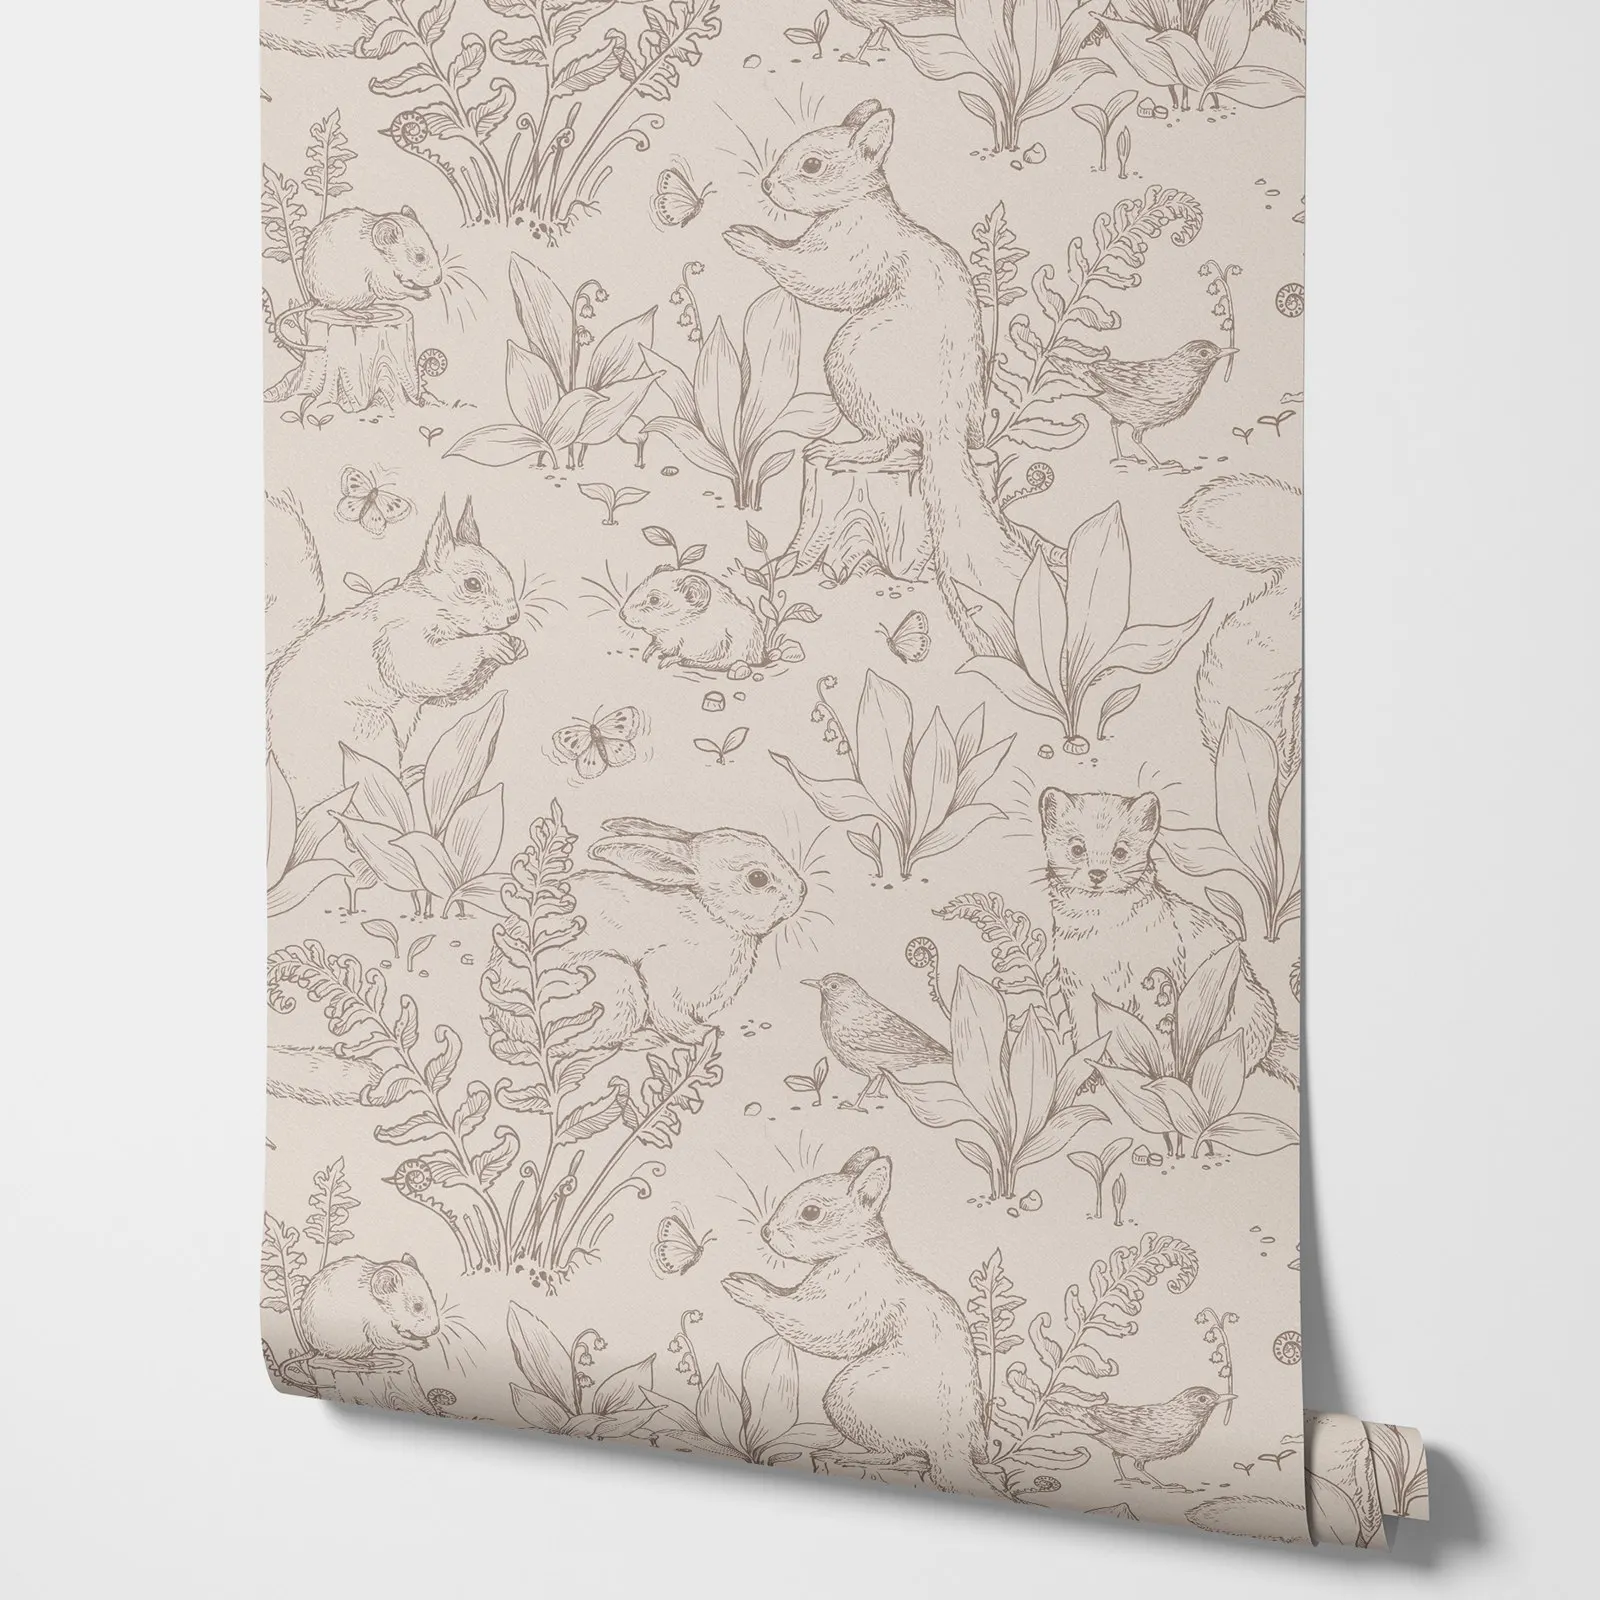
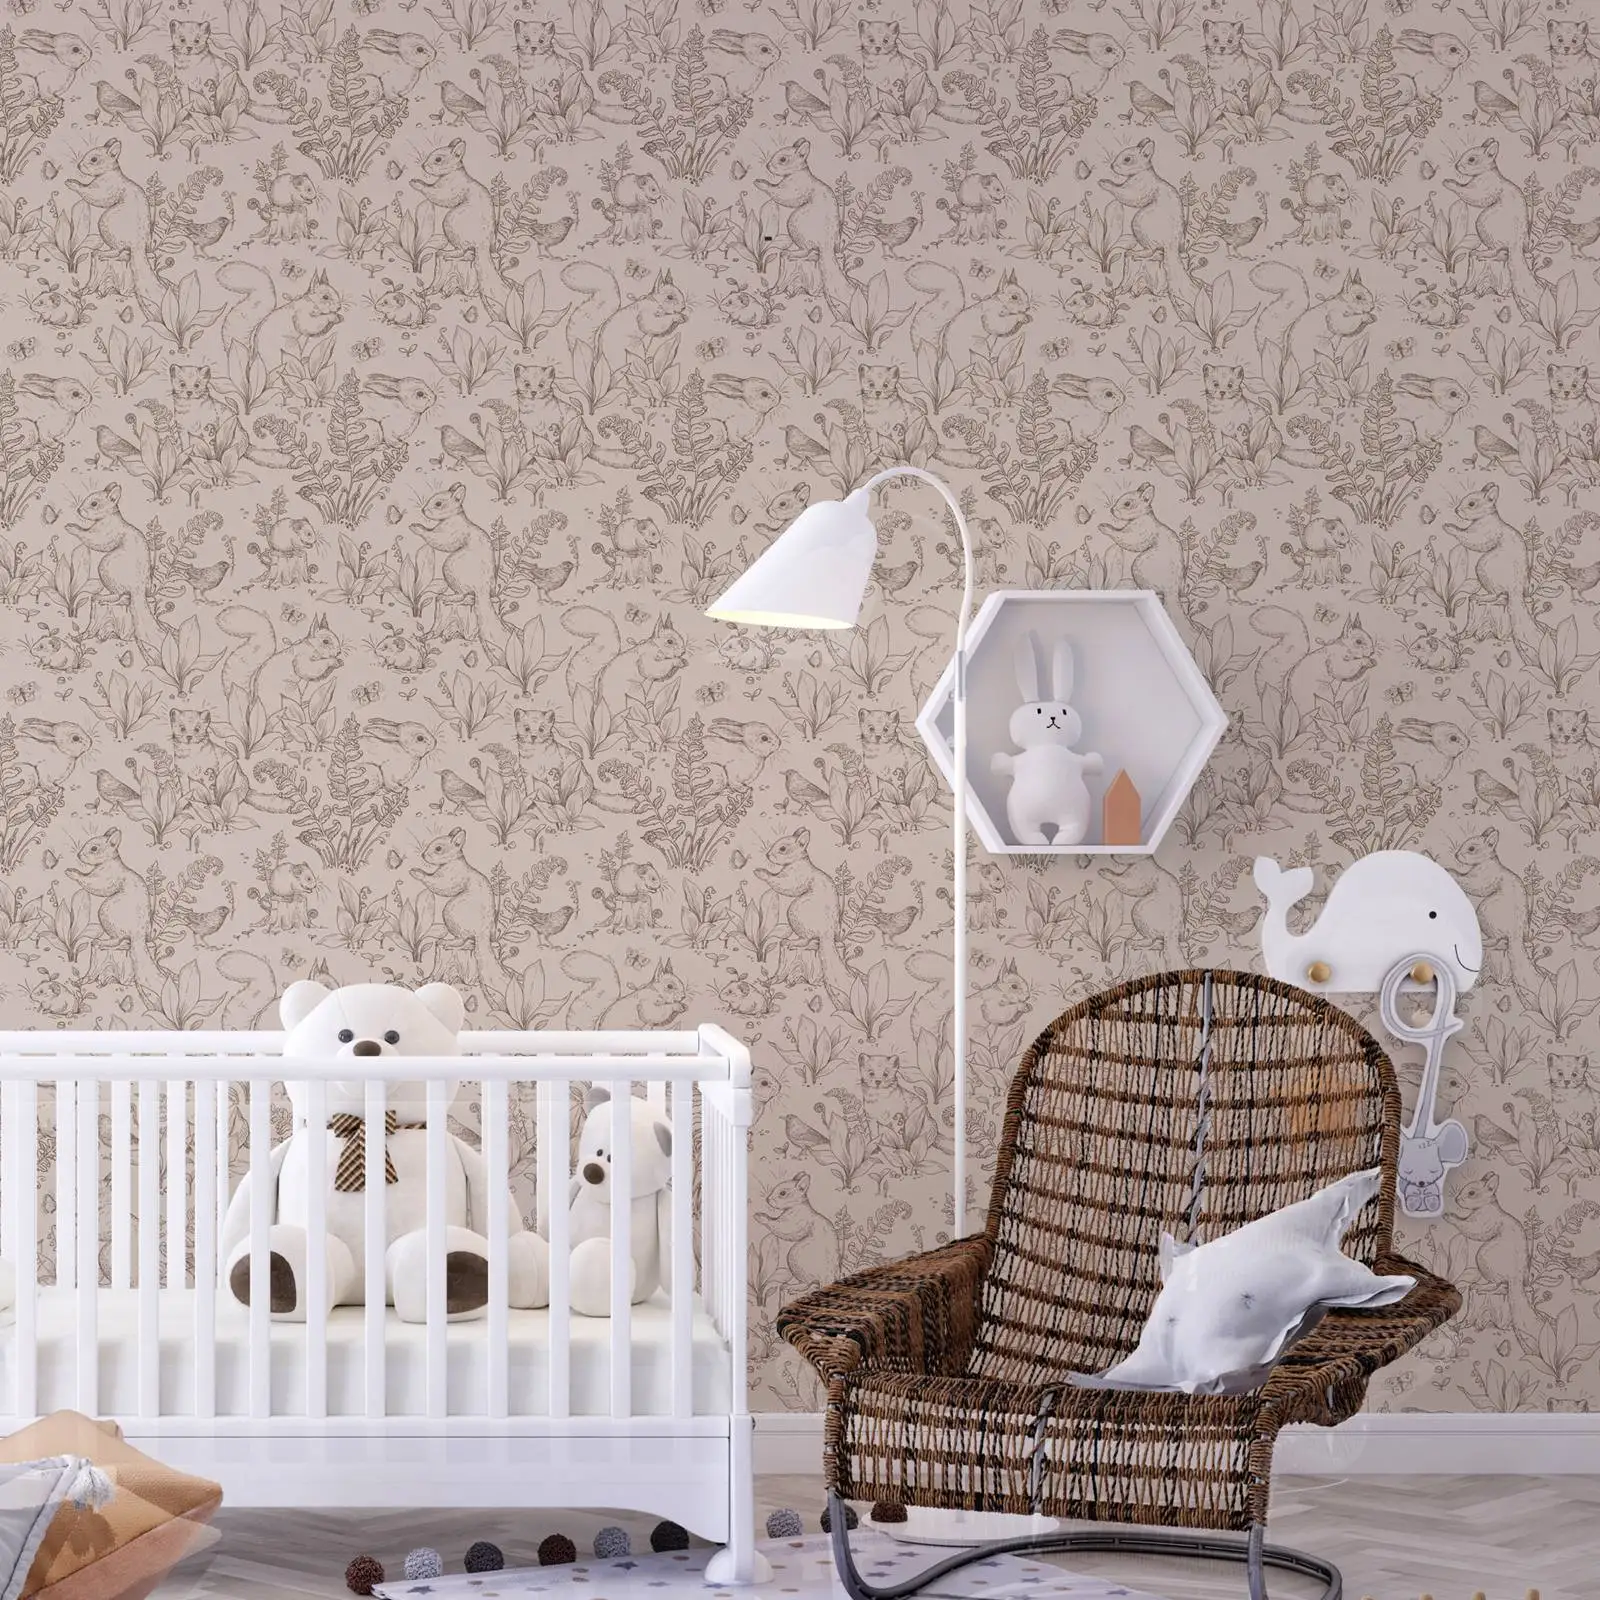
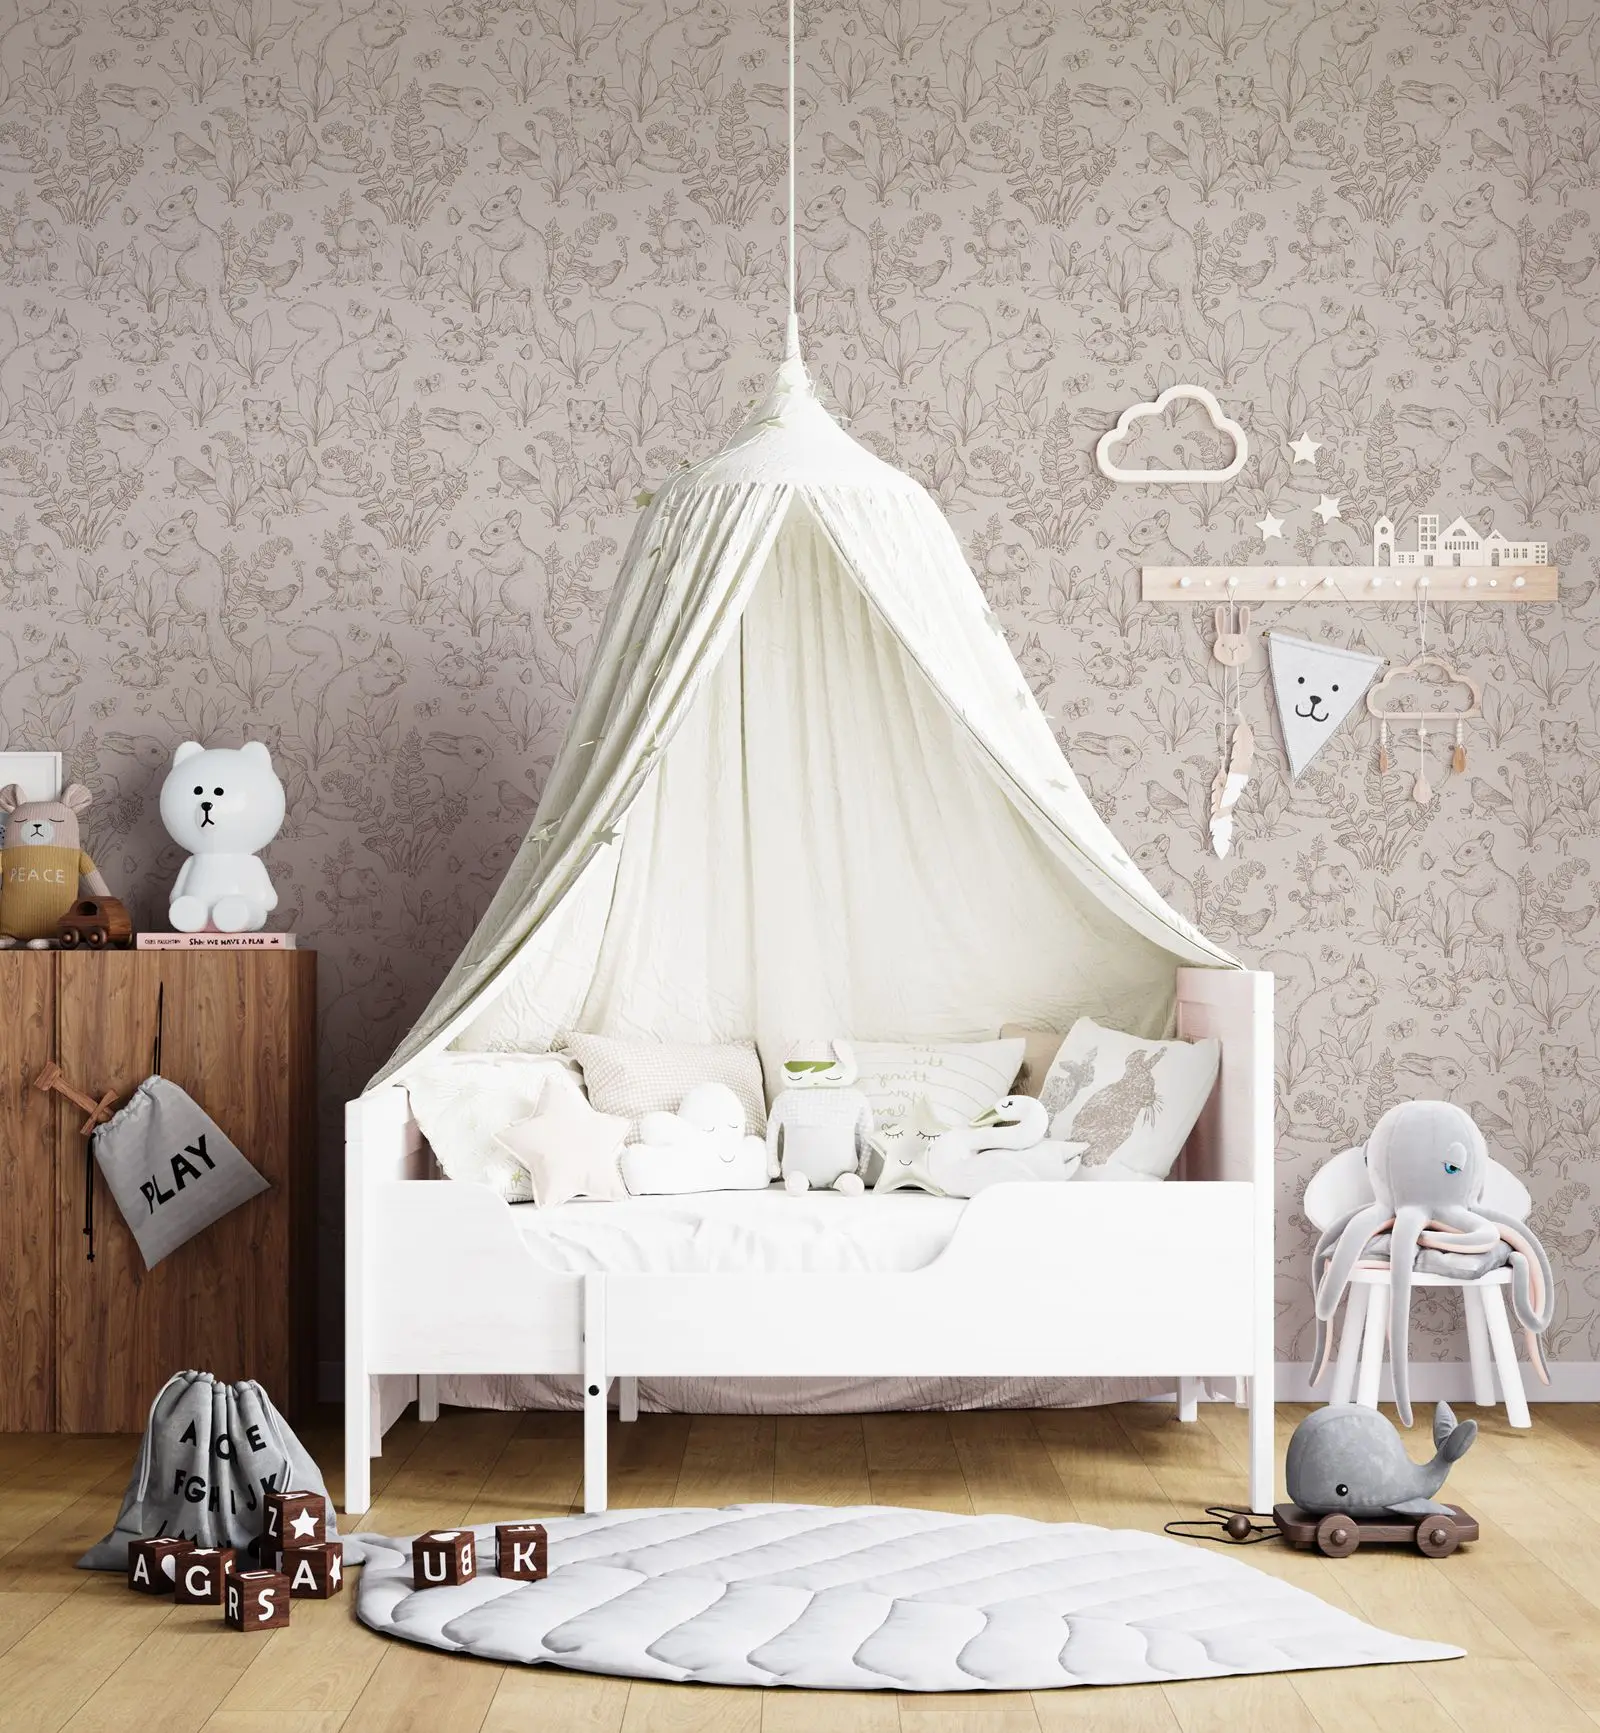
Papel pintado Forest Life. Papel pintado beige con animales en estilo bosque con Conejo y pequeño perro de pradera
50cm X600cm
$188.315,40
Sale price
$188.315,40
Regular price
$0,00
Skip to product information


Papel pintado Forest Life. Papel pintado beige con animales en estilo bosque con Conejo y pequeño perro de pradera
$188.315,40
Sale price
$188.315,40
Regular price
$0,00
Shipping calculated at checkout.
Details
SPECIFICATIONS
CN: Jiangsu
Característica: Respetuoso con el medio ambiente,Resistente al Moho,Sin formaldehído
Certificación: NONE
Estilo: PARA NIÑOS
Función: Resistente al molde,Resistente al fuego,A prueba de humedad,Absorbente de sonido,Antiestático
Material: Papel tapiz de fibra de madera
Nombre de la marca: Pixel&Wall
Número de modelo: 10008
Origen: CN(Origen)
Producto químico de alta preocupación: Ninguno
Tipo: Papeles Tapiz
Tipo de Patrón: Bosque
Tratamiento de Superficies: Papeles Tapiz
Unidad de carga: USD/Rollo
Uso: Entretenimiento,COMERCIO,administración,Hogar
es personalizado: Sí
usar: Sala de estar


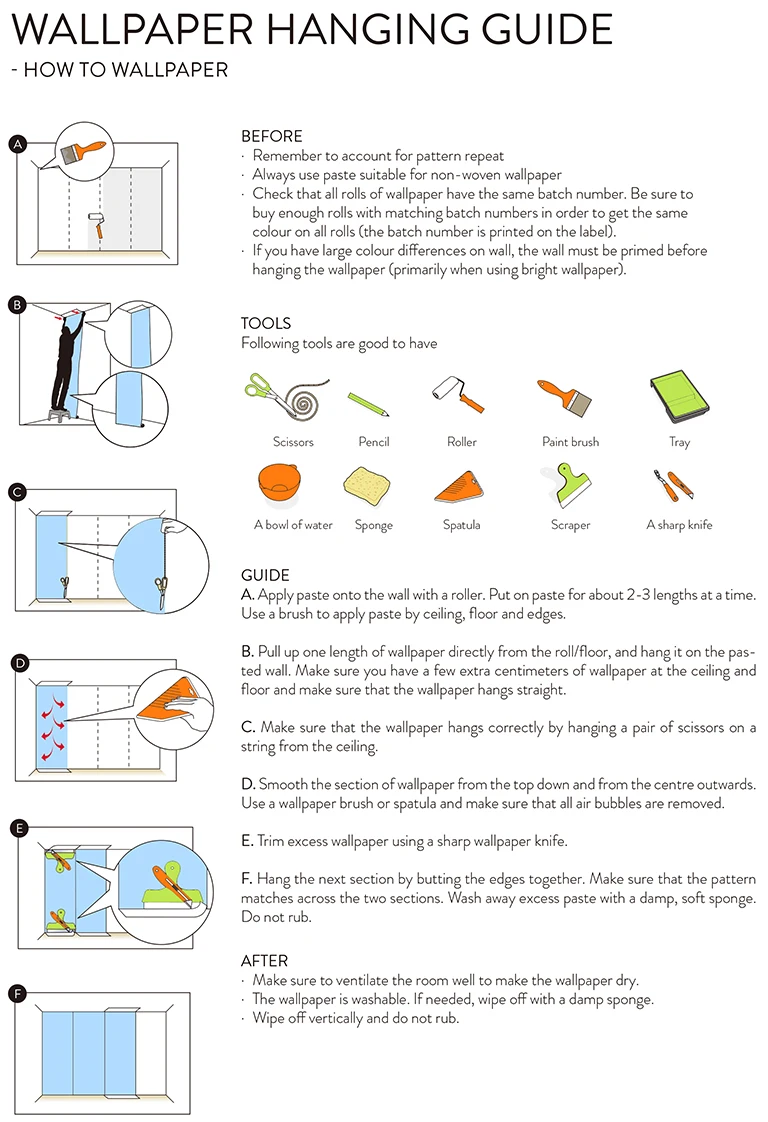
How to apply our wallpaper?
STEP 1: Prepare the wall surface
Your wall must be completely flat, clean and dry. Levels rough surfaces, rough, holes and uneven spots.
Your wall should be a uniform color. If not, you may notice differences in color on your wall once installed. If your wall has multiple colors, we recommend that you paint again.
Make a vertical line with a plumb line on the left edge of the area you want to cover with the mural. If you have a plumb, one can make your own by tying a heavy object on the end of a rope. This line is very important because it is the guide to start placing your mural.
STEP 2: Prepare the wallpaper
The wallpaper panels are made with a width of 50 cm(19.7"). Panels are received printed continuously on a roll and numbered at the top.
Cut independent panels and do a preview on the ground following the numerical order from left to right.
Measure with a meter the height of your wall. If it's less than the photomural, you must cut it to fit properly. Do it while you have it on the floor but leave a margin of an inch to correct any differences in level on the wall.
STEP 3: Prepare the glue
You may buy the glue from your supermarket, confirm it's for non-woven wallpaper use.
Prepare the glue following the instructions on the bag of the glue you bought. Do it slowly. So you will obtain a uniform mixture and without bubbles.
STEP 4: Attach the paper to the wall
Applying glue on the wall evenly using a brush or a paint roller. Start distributing from the line you marked as a guide to the plummet. Don't paste the entire wall, do it only in the area that will cover the first panel on the left, leaving a few inches outside the right.
Apply the first panel of the mural on the wall starting at the top left. Check that is aligned with the guide.
Presses against the paper with a dry roller or sponge to remove any air bubbles.
Place the following panels in the same way in numerical order. The panels must not be mounted on each other but are set on edge.
Clean the excess glue with a damp sponge.
STEP 5: Finishing
With the help of a ruler and a cutter, adjust the sides and the top and bottom of the wall if necessary.
Let dry 24 hours; you will get a perfect final result
Materiales + Cuidados
Damos prioridad a la calidad a la hora de seleccionar los materiales para nuestros artículos, eligiendo tejidos y acabados de primera calidad que garantizan durabilidad, comodidad y un atractivo atemporal.
Envío + Devoluciones
Nos esforzamos por procesar y enviar todos los pedidos de manera oportuna, trabajando diligentemente para garantizar que sus artículos le lleguen lo antes posible.
También te podría gustar...